Manage engagements
1. Adding a New Engagement
Follow these steps to create a new task:
Step 1: Navigate to the Calendar Section
Head to the Calendar section of the application and click the "Add New Task" button.
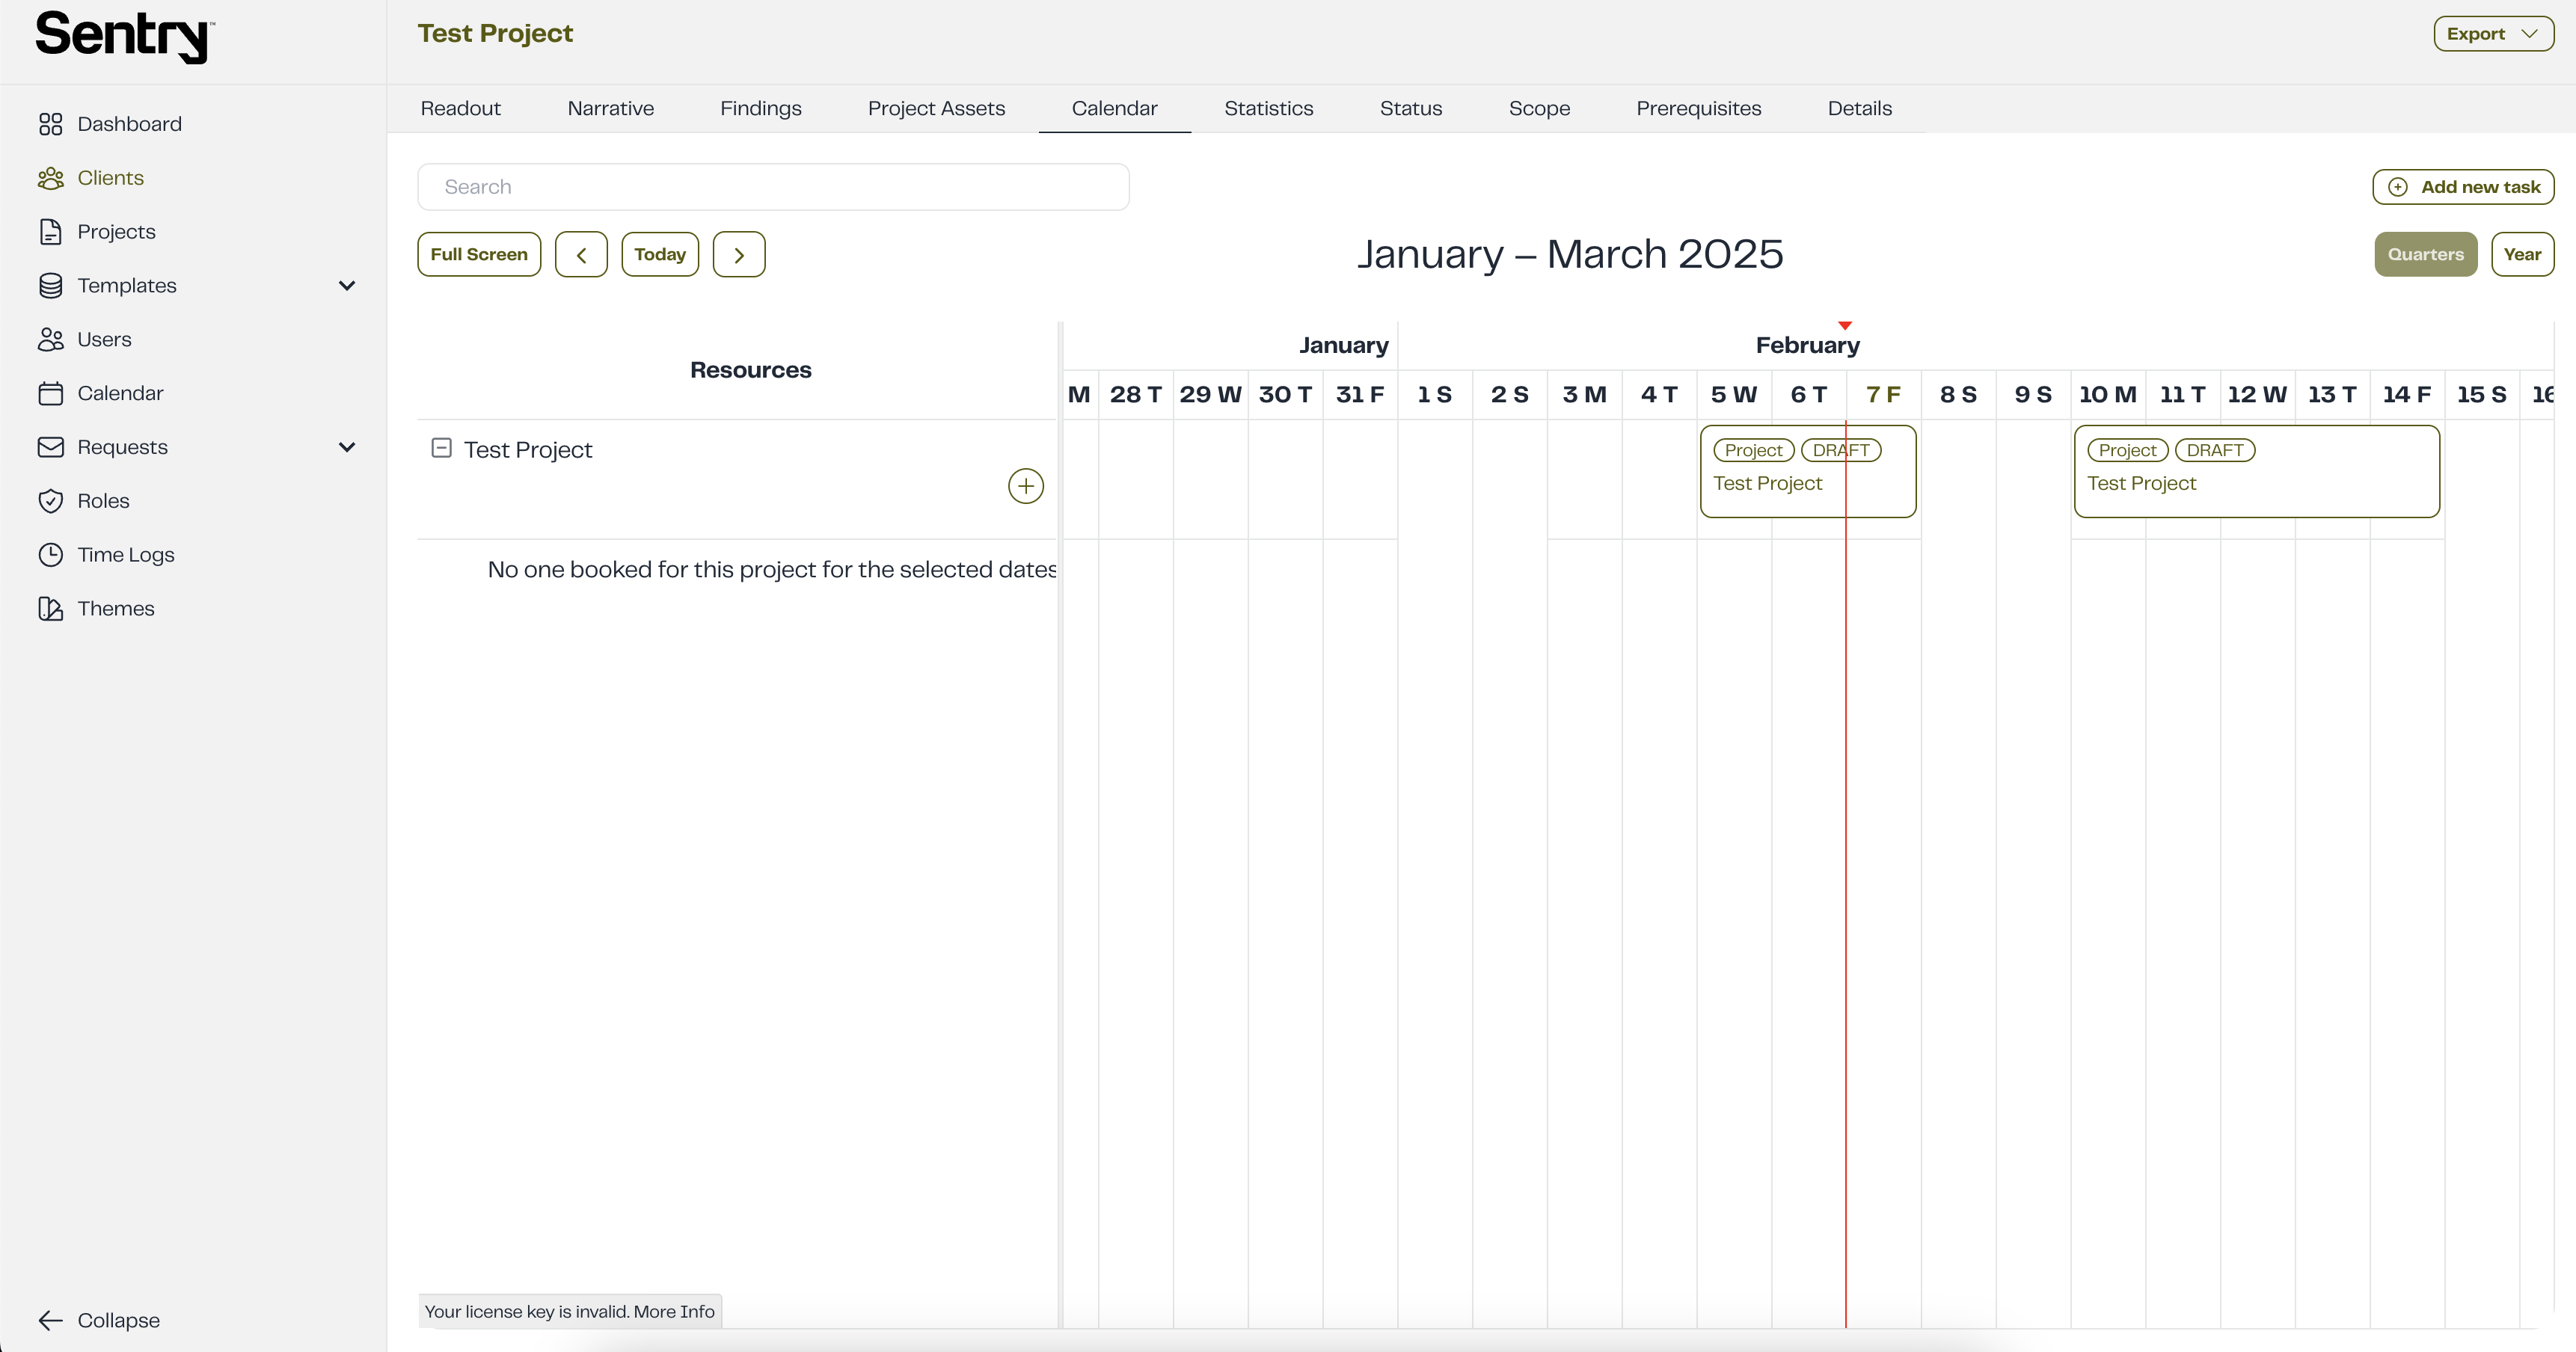
A modal will pop up.
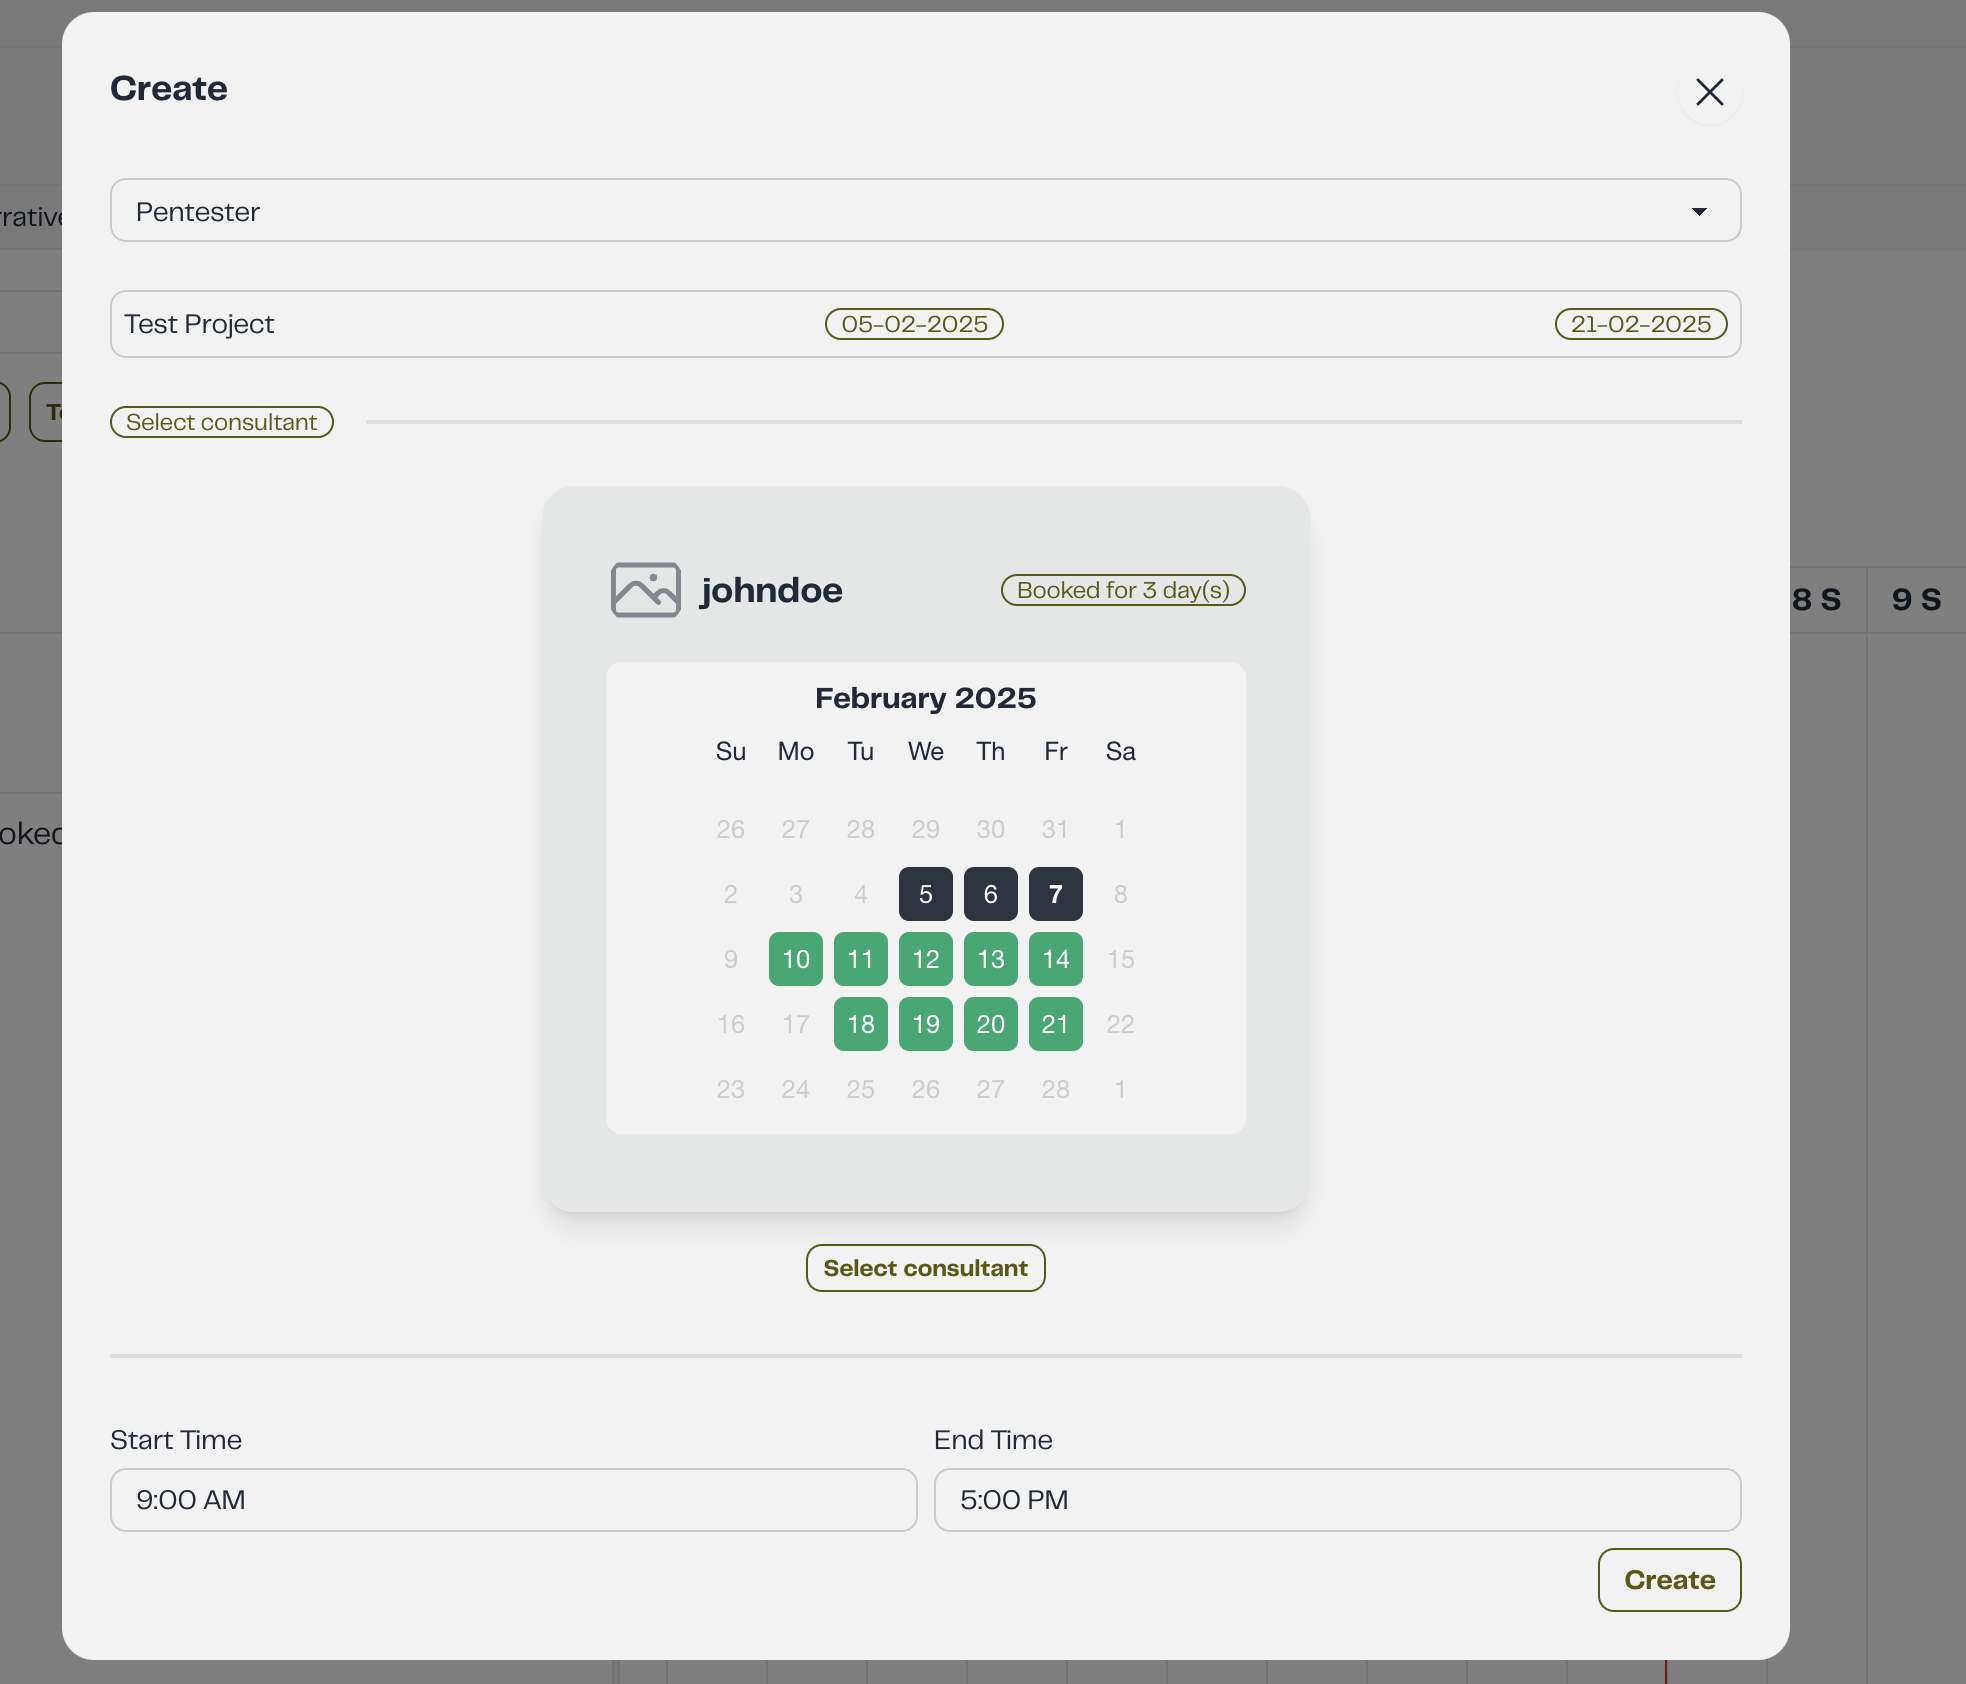
Step 2: Fill in Engagement Details
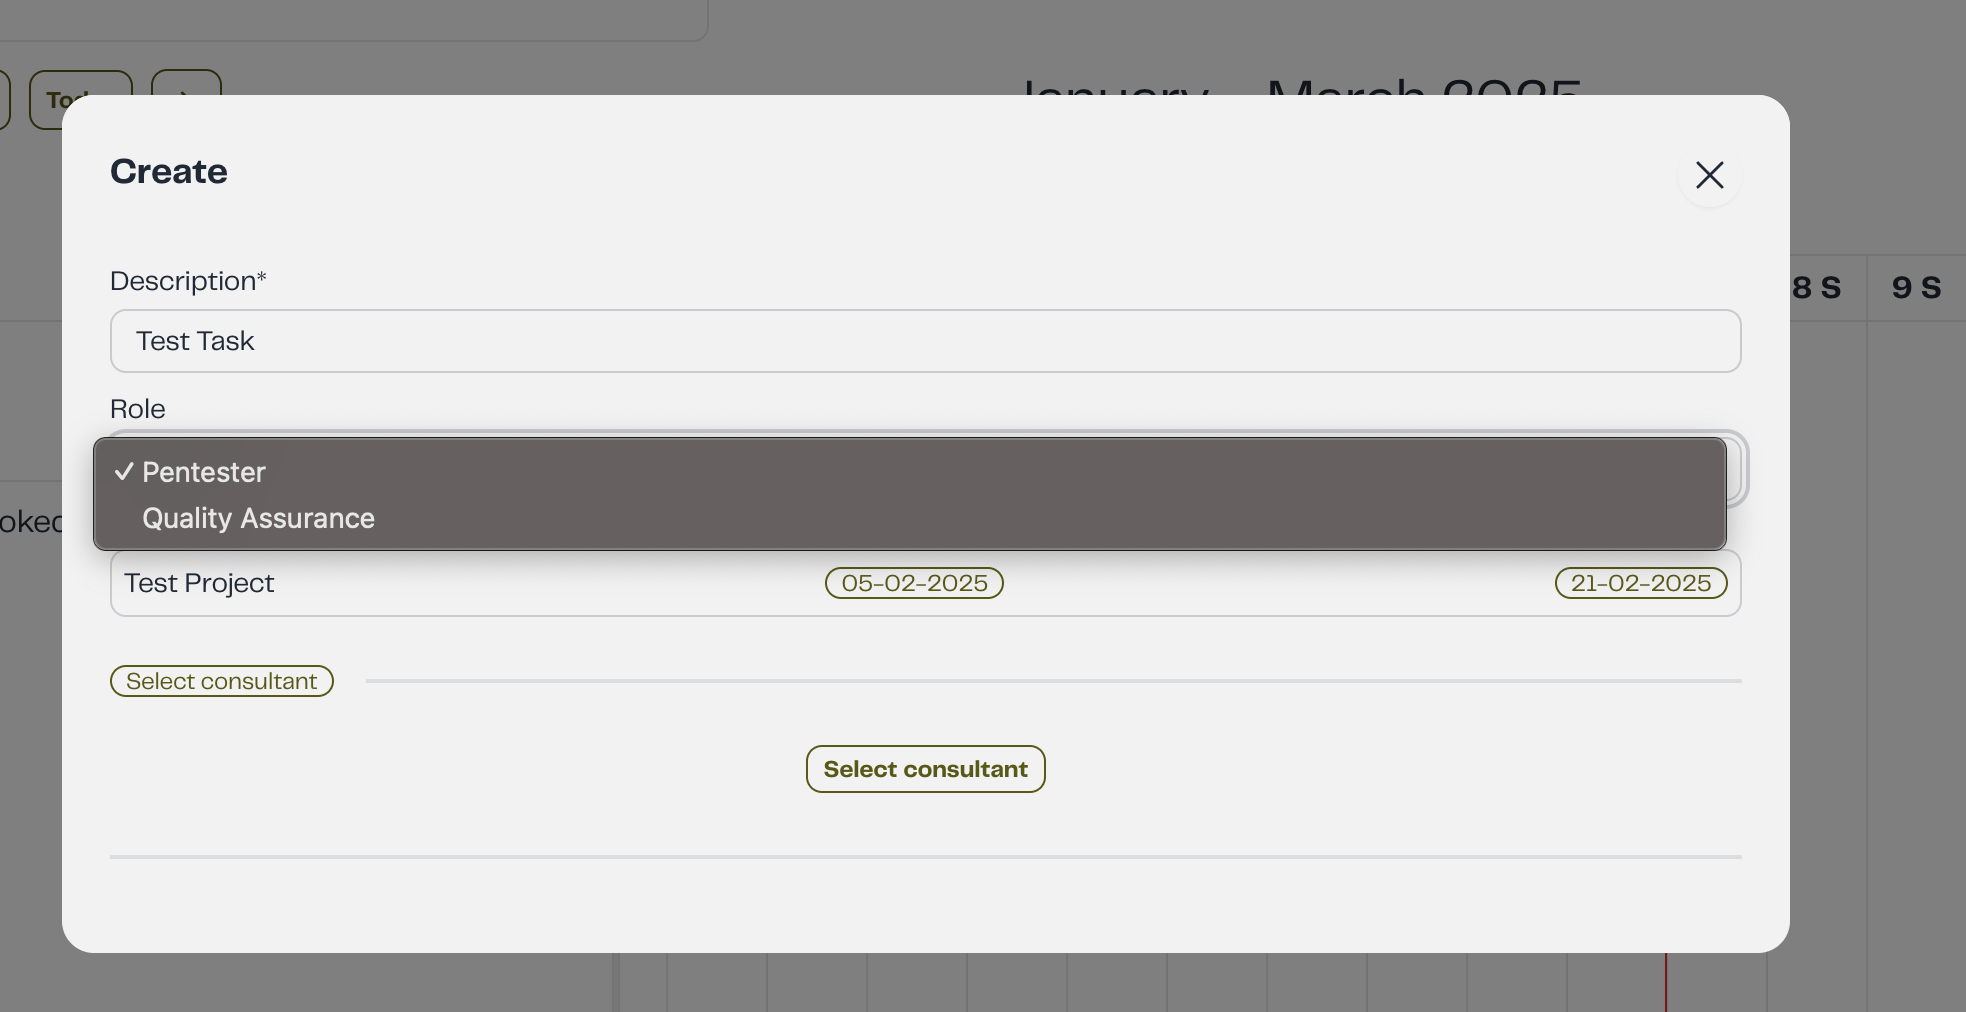
- Description – Provide a brief description of the task.
- Role – Specify the role of the user involved in this project (e.g., Pentester, QA, Team Lead).
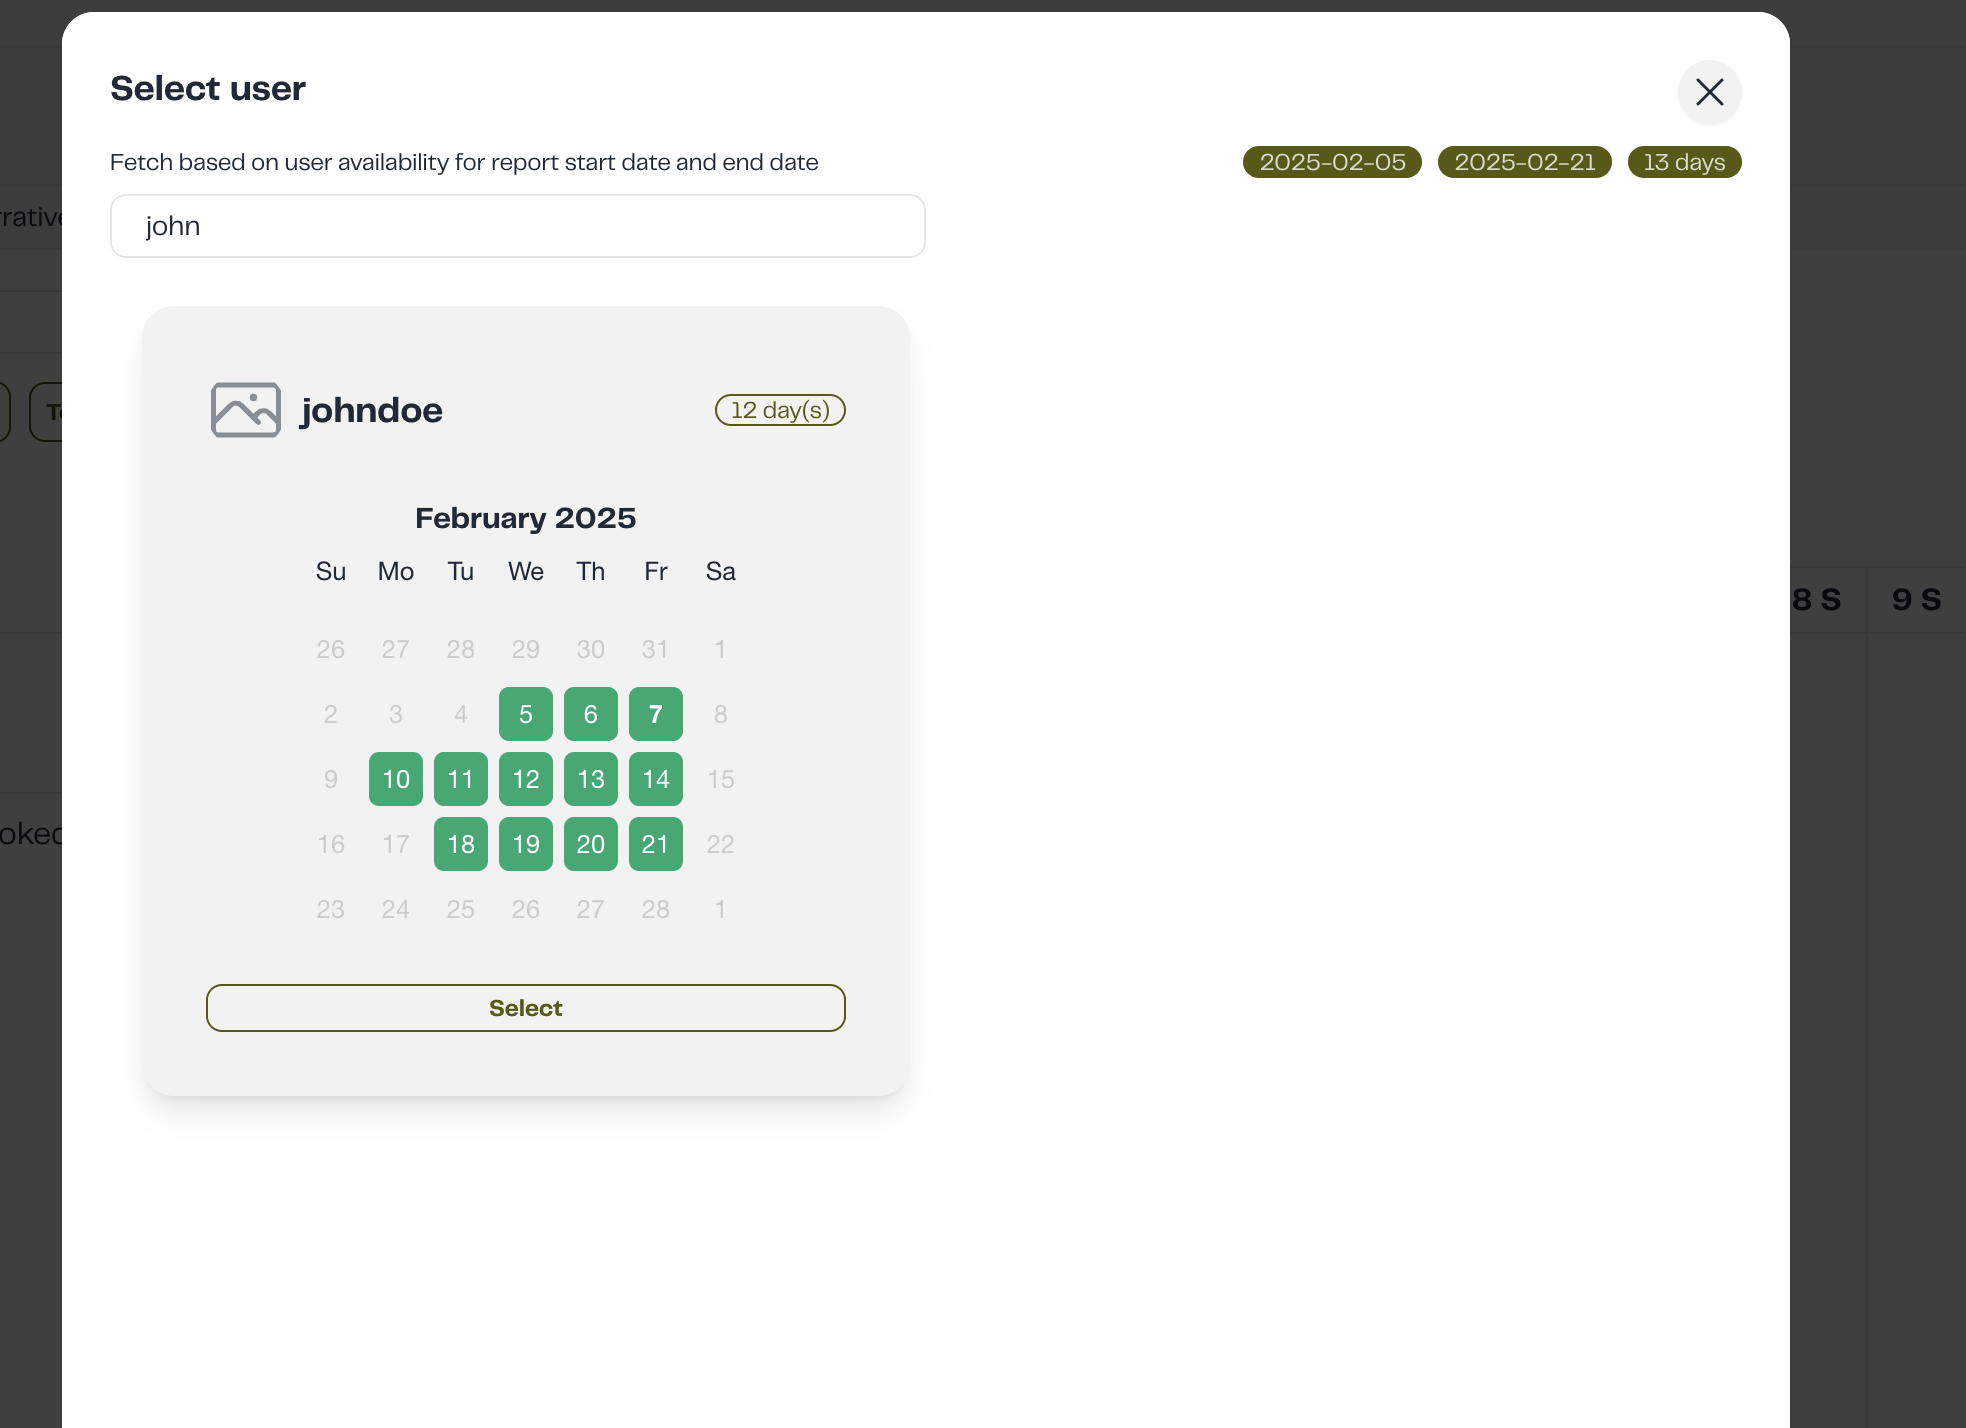
- Consultant – Select the consultant who will work on this project by clicking the "Select Consultant" button. A new modal will appear displaying available users. You can search for the desired user and select them.
 |  |
|---|
-
Select Date Range – Choose the date range for the engagement. Dates marked in green indicate when the pentester is available. Select a start and end date by clicking on the desired dates.
-
Select Working Hours – Choose the number of hours the pentester will work each day. The default working hours are from 9:00 AM to 5:00 PM.
Booking Information
You can adjust a consultant's working hours by partially booking or overbooking them. Partially booking reduces their working hours to less than 8, while overbooking extends their hours beyond 8.
Step 3: Create Engagement
Click the Create button to finalize and create the engagement.
Email Notification
An email notification will be sent to the engaged user, informing them that they have been booked for the project along with the specified date range.
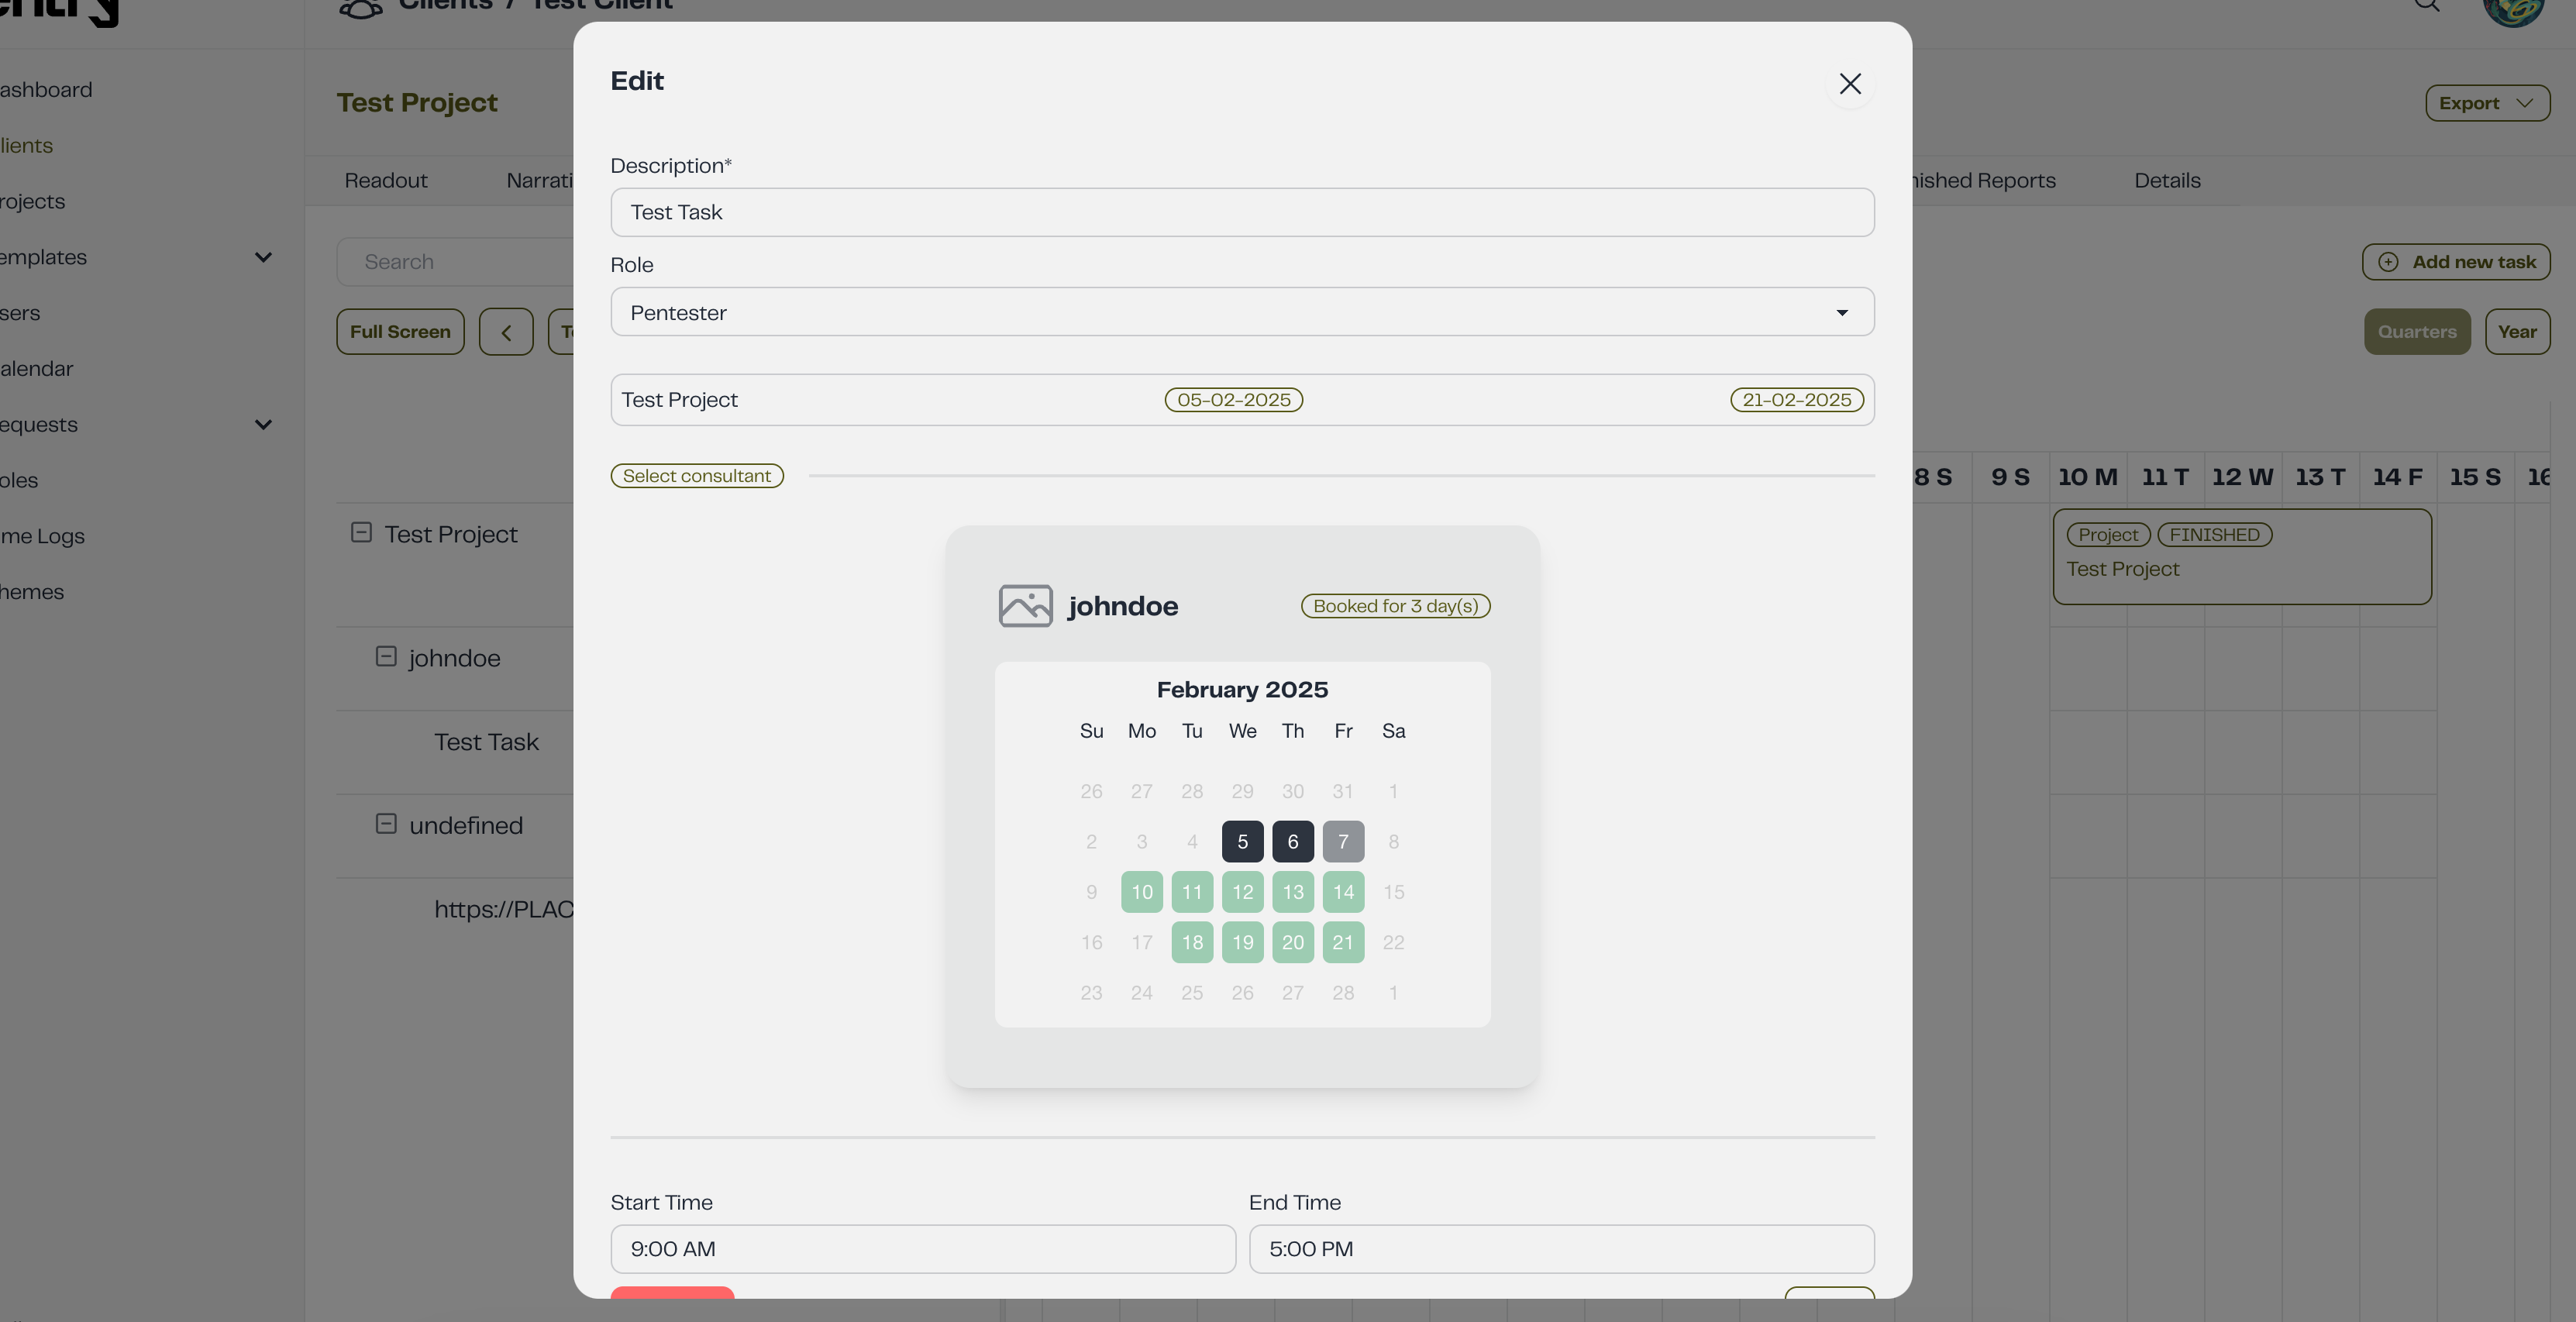
2. Updating Engagement
Follow these steps to update an engagement:
-
Click the plus icon next to the user's name to expand the engagement.
-
Click on the working hours to open the engagement modal.
-
Modify the engagement as needed by adding or removing days.
-
Click the Save button to confirm the changes.
Email Notification
An email notification will be sent to the engaged user, informing them that their engagement for the project has been updated.
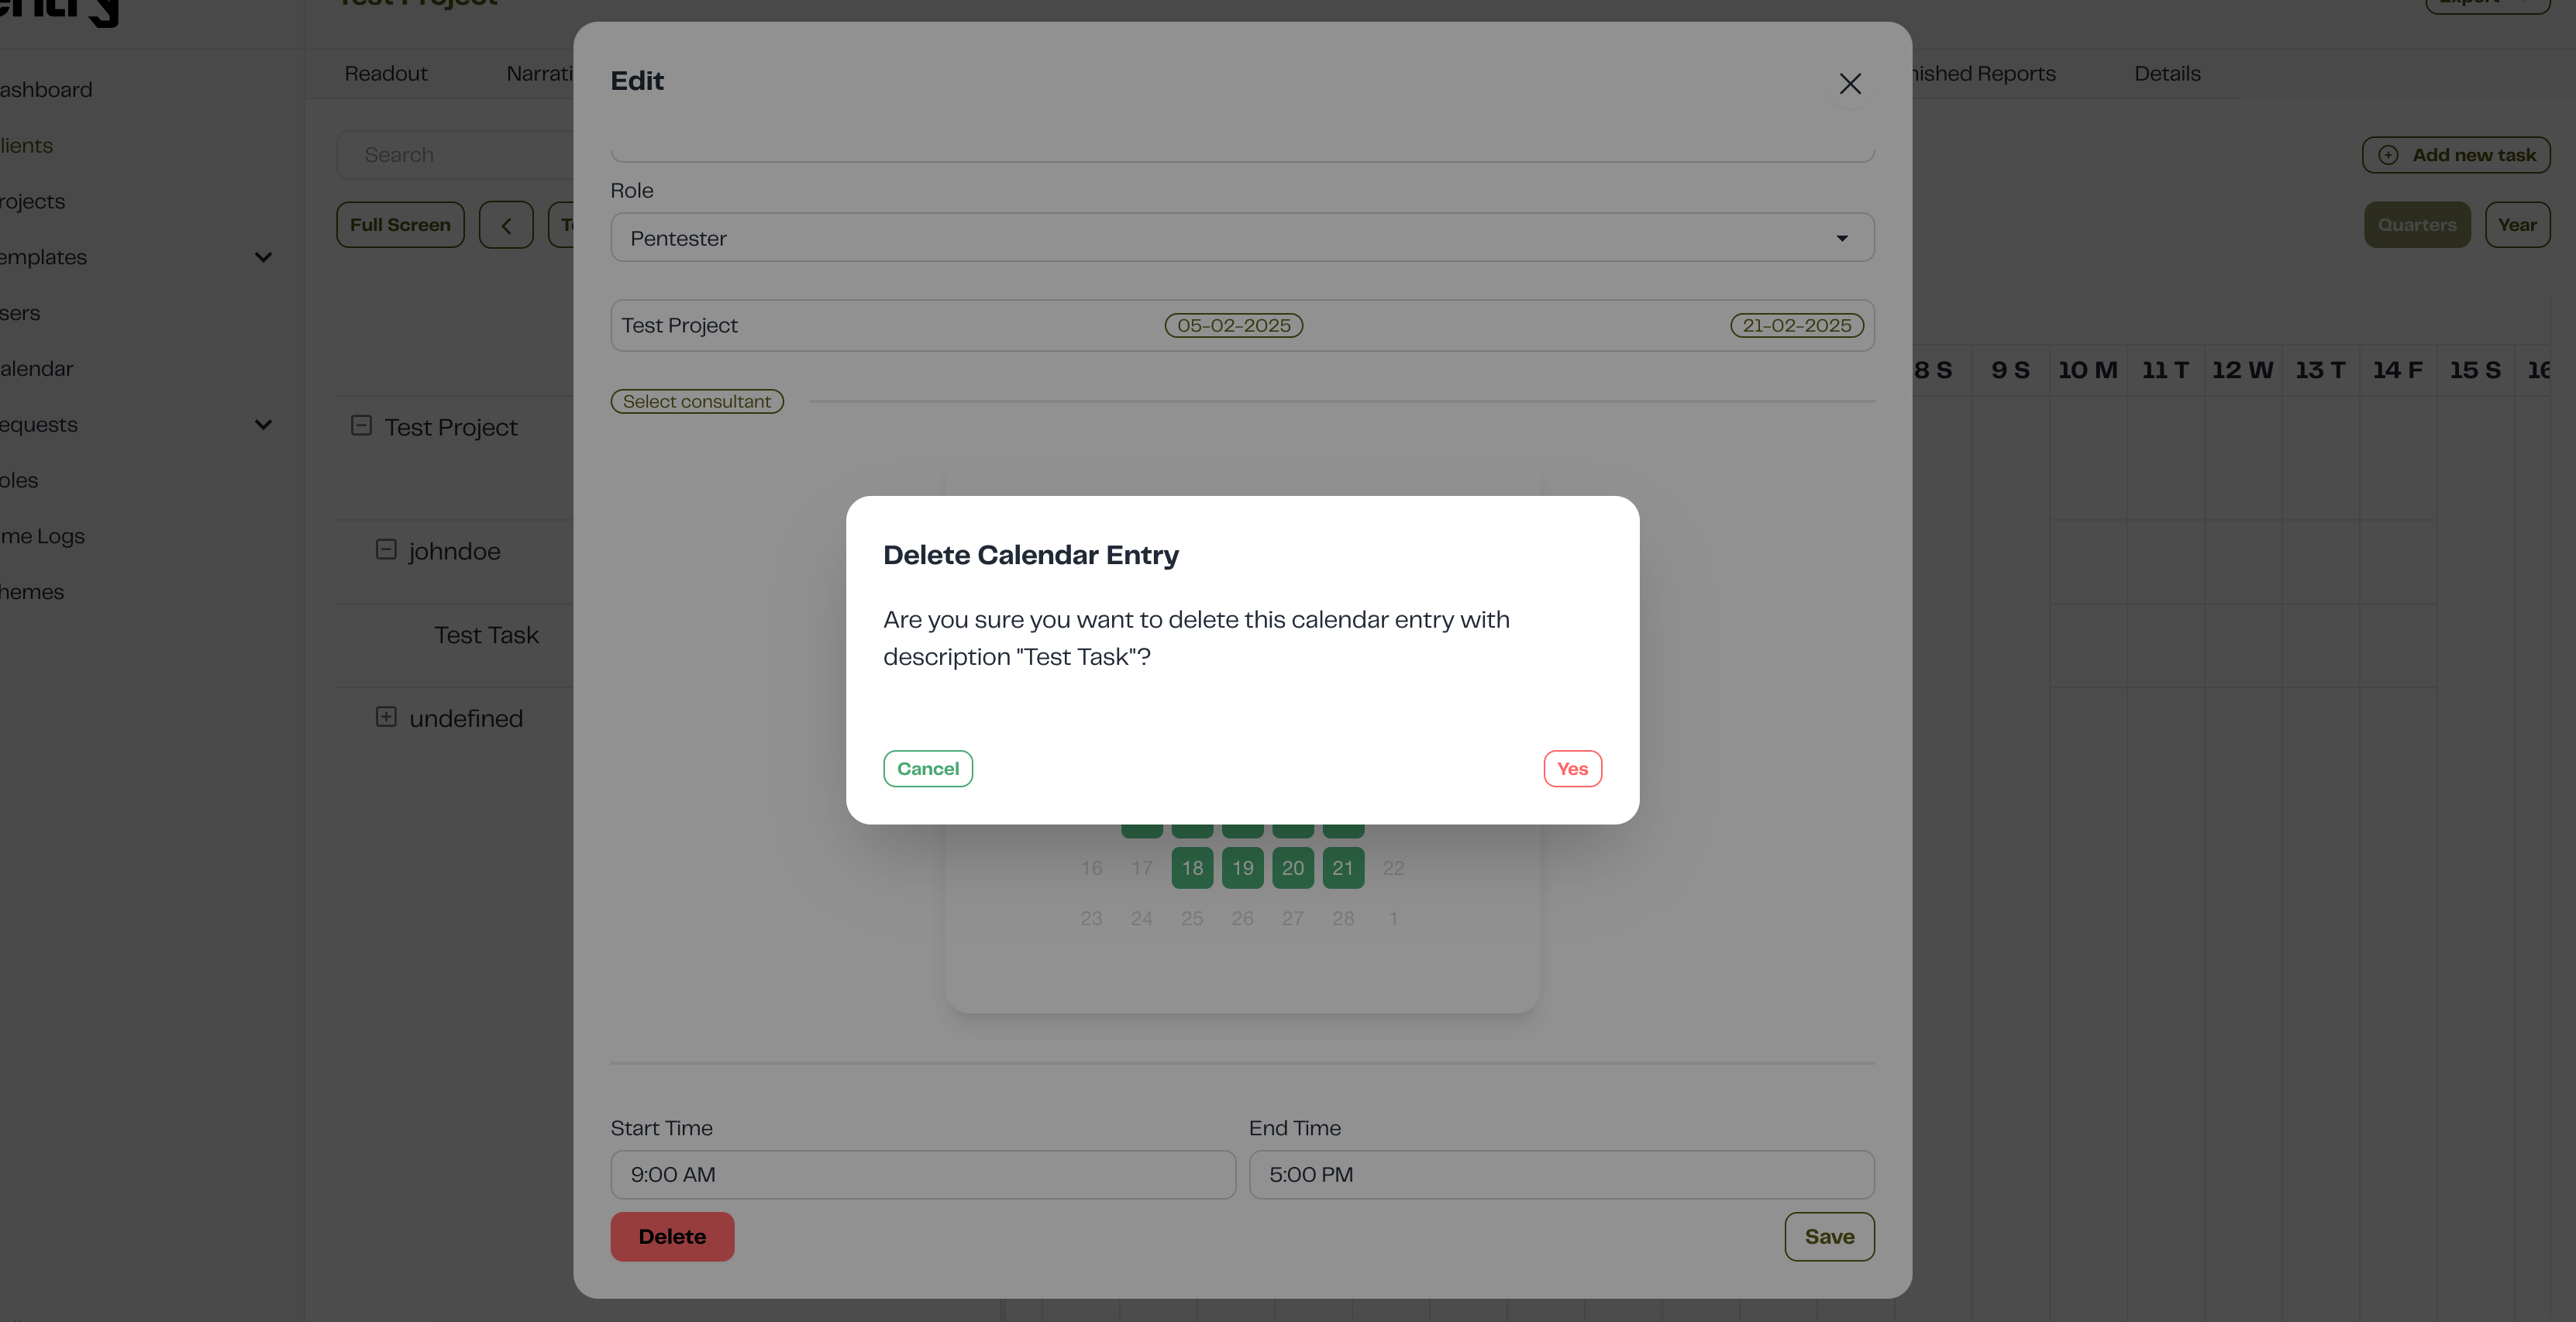
3. Deleting Engagement
-
To delete an engagement, follow the same steps as updating it.
-
Click the Delete button. A confirmation modal will appear.
-
Click Yes to confirm the deletion or Cancel to abort.
4. Overbooking a Consultant
If a consultant is booked for 8 hours but needs to be overbooked for additional hours, follow these steps:
-
Click on the day the consultant is engaged.
-
Add the extra hours the consultant will work.
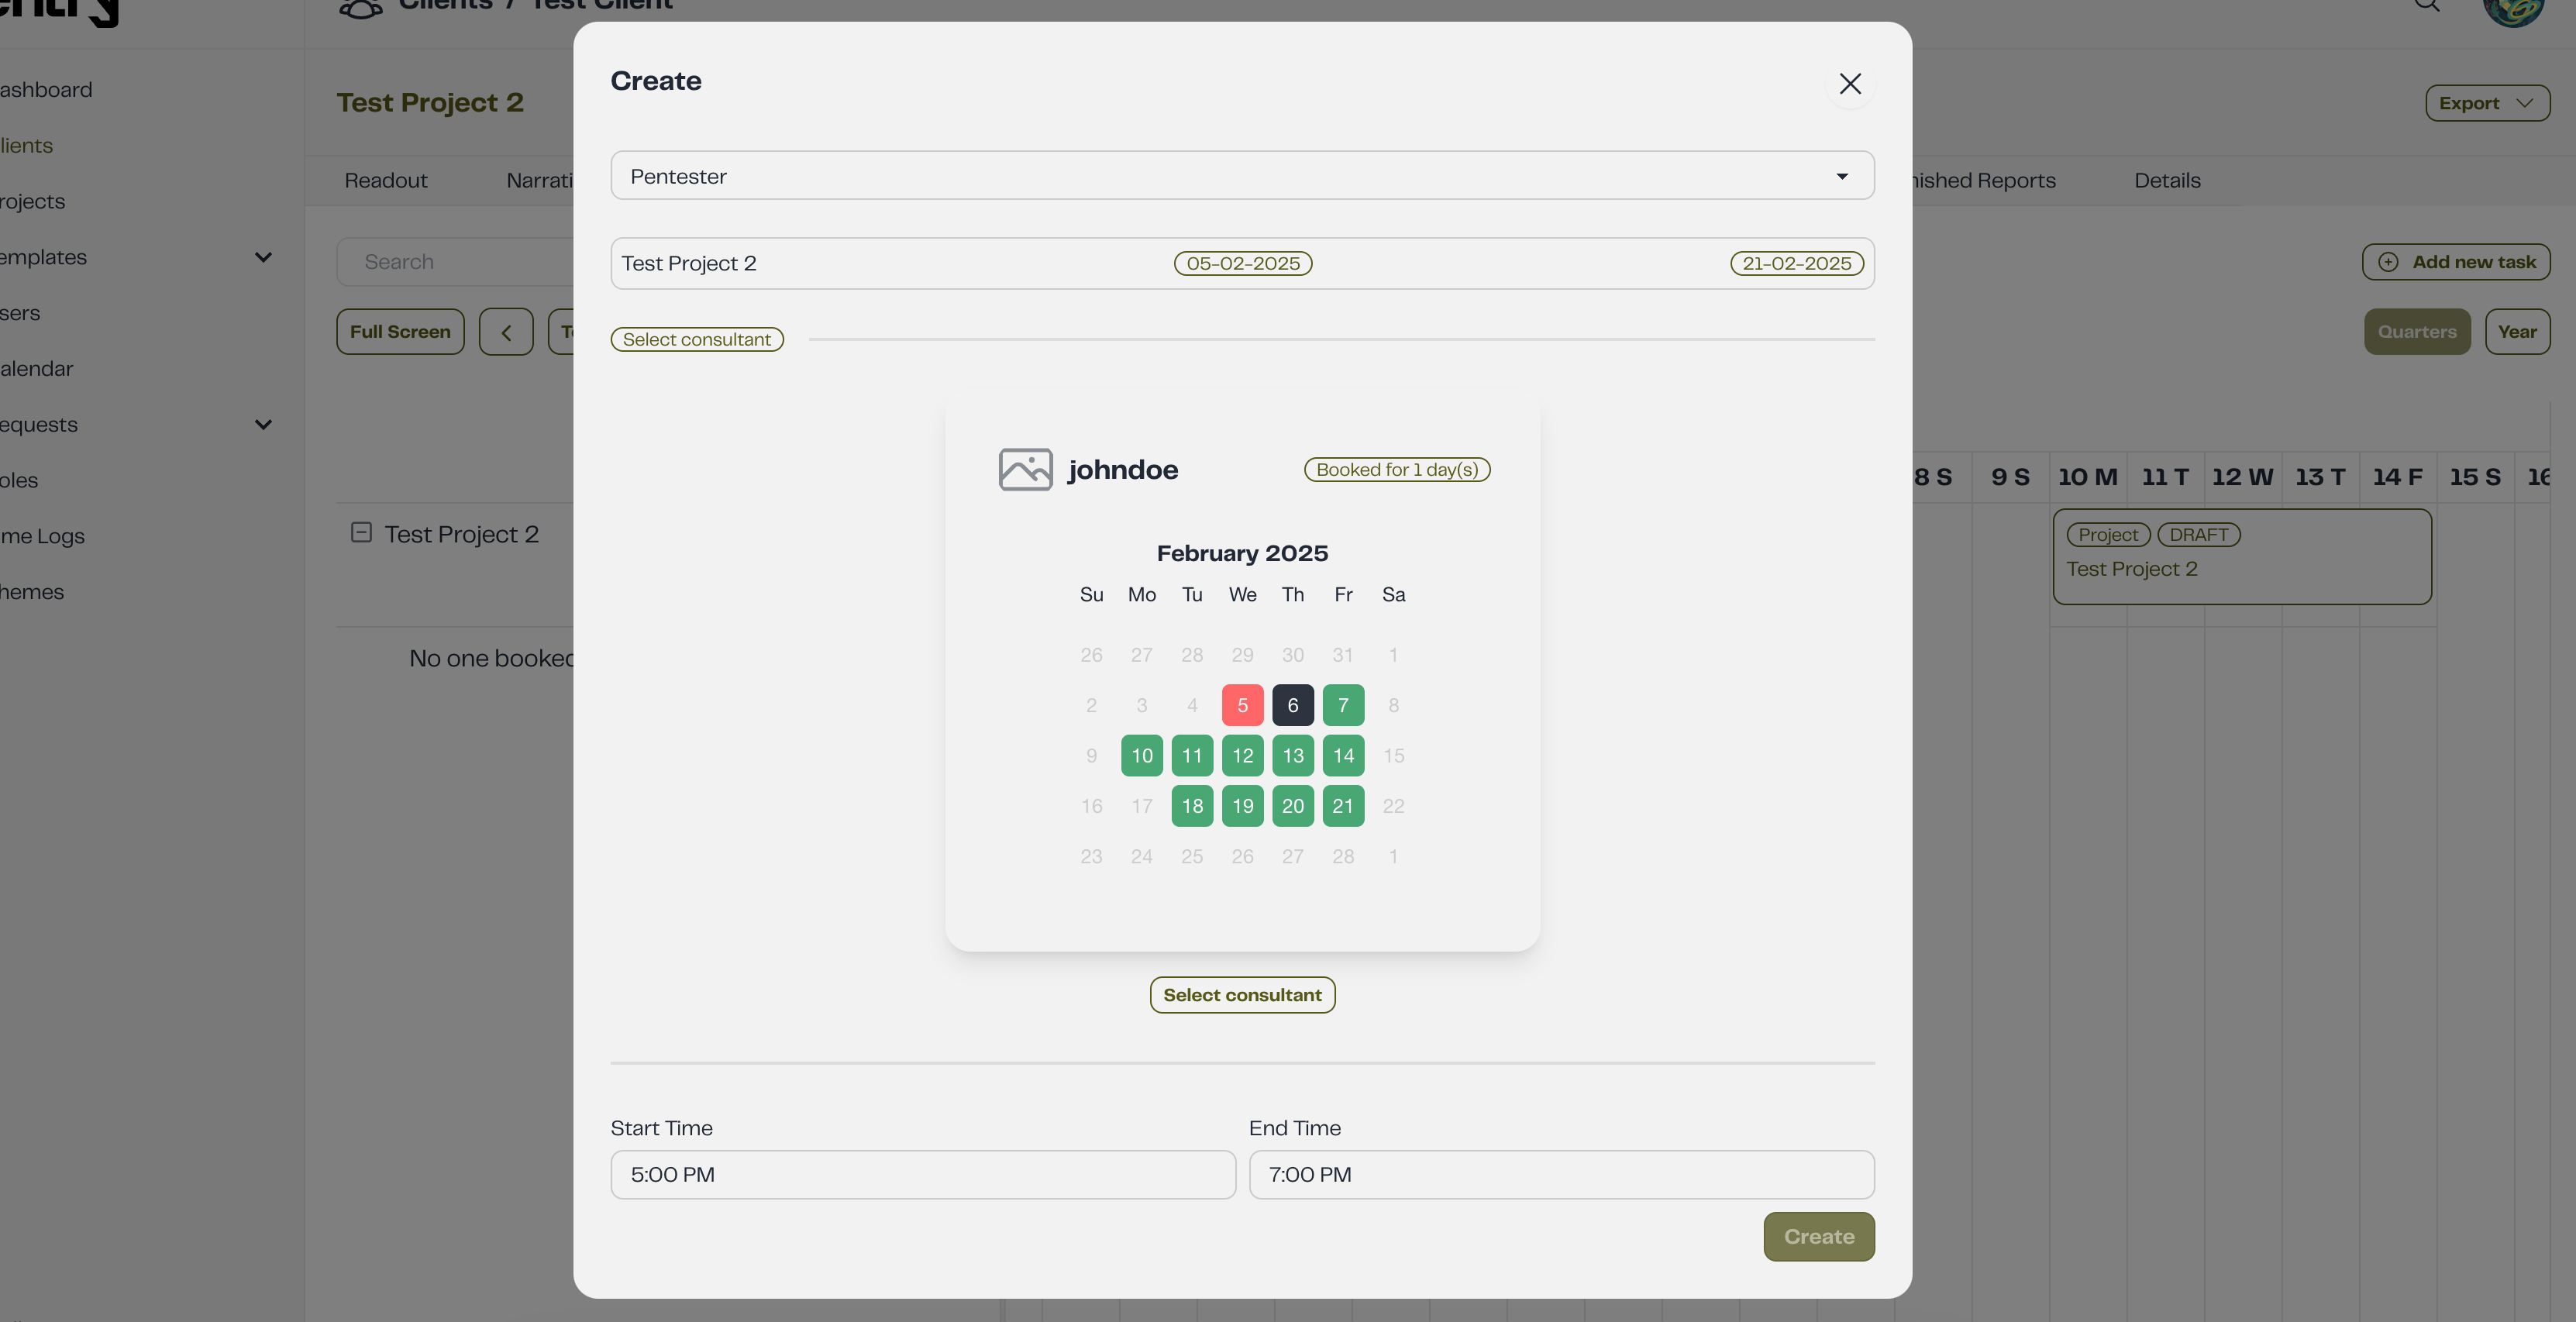
- Click Save to confirm the changes.
Email Notification
An email notification will be sent to the engaged user, informing them of their engagement on the project, including any extended hours. For example, if they are overbooked from 17:00 to 19:00, the updated hours will be reflected accordingly.
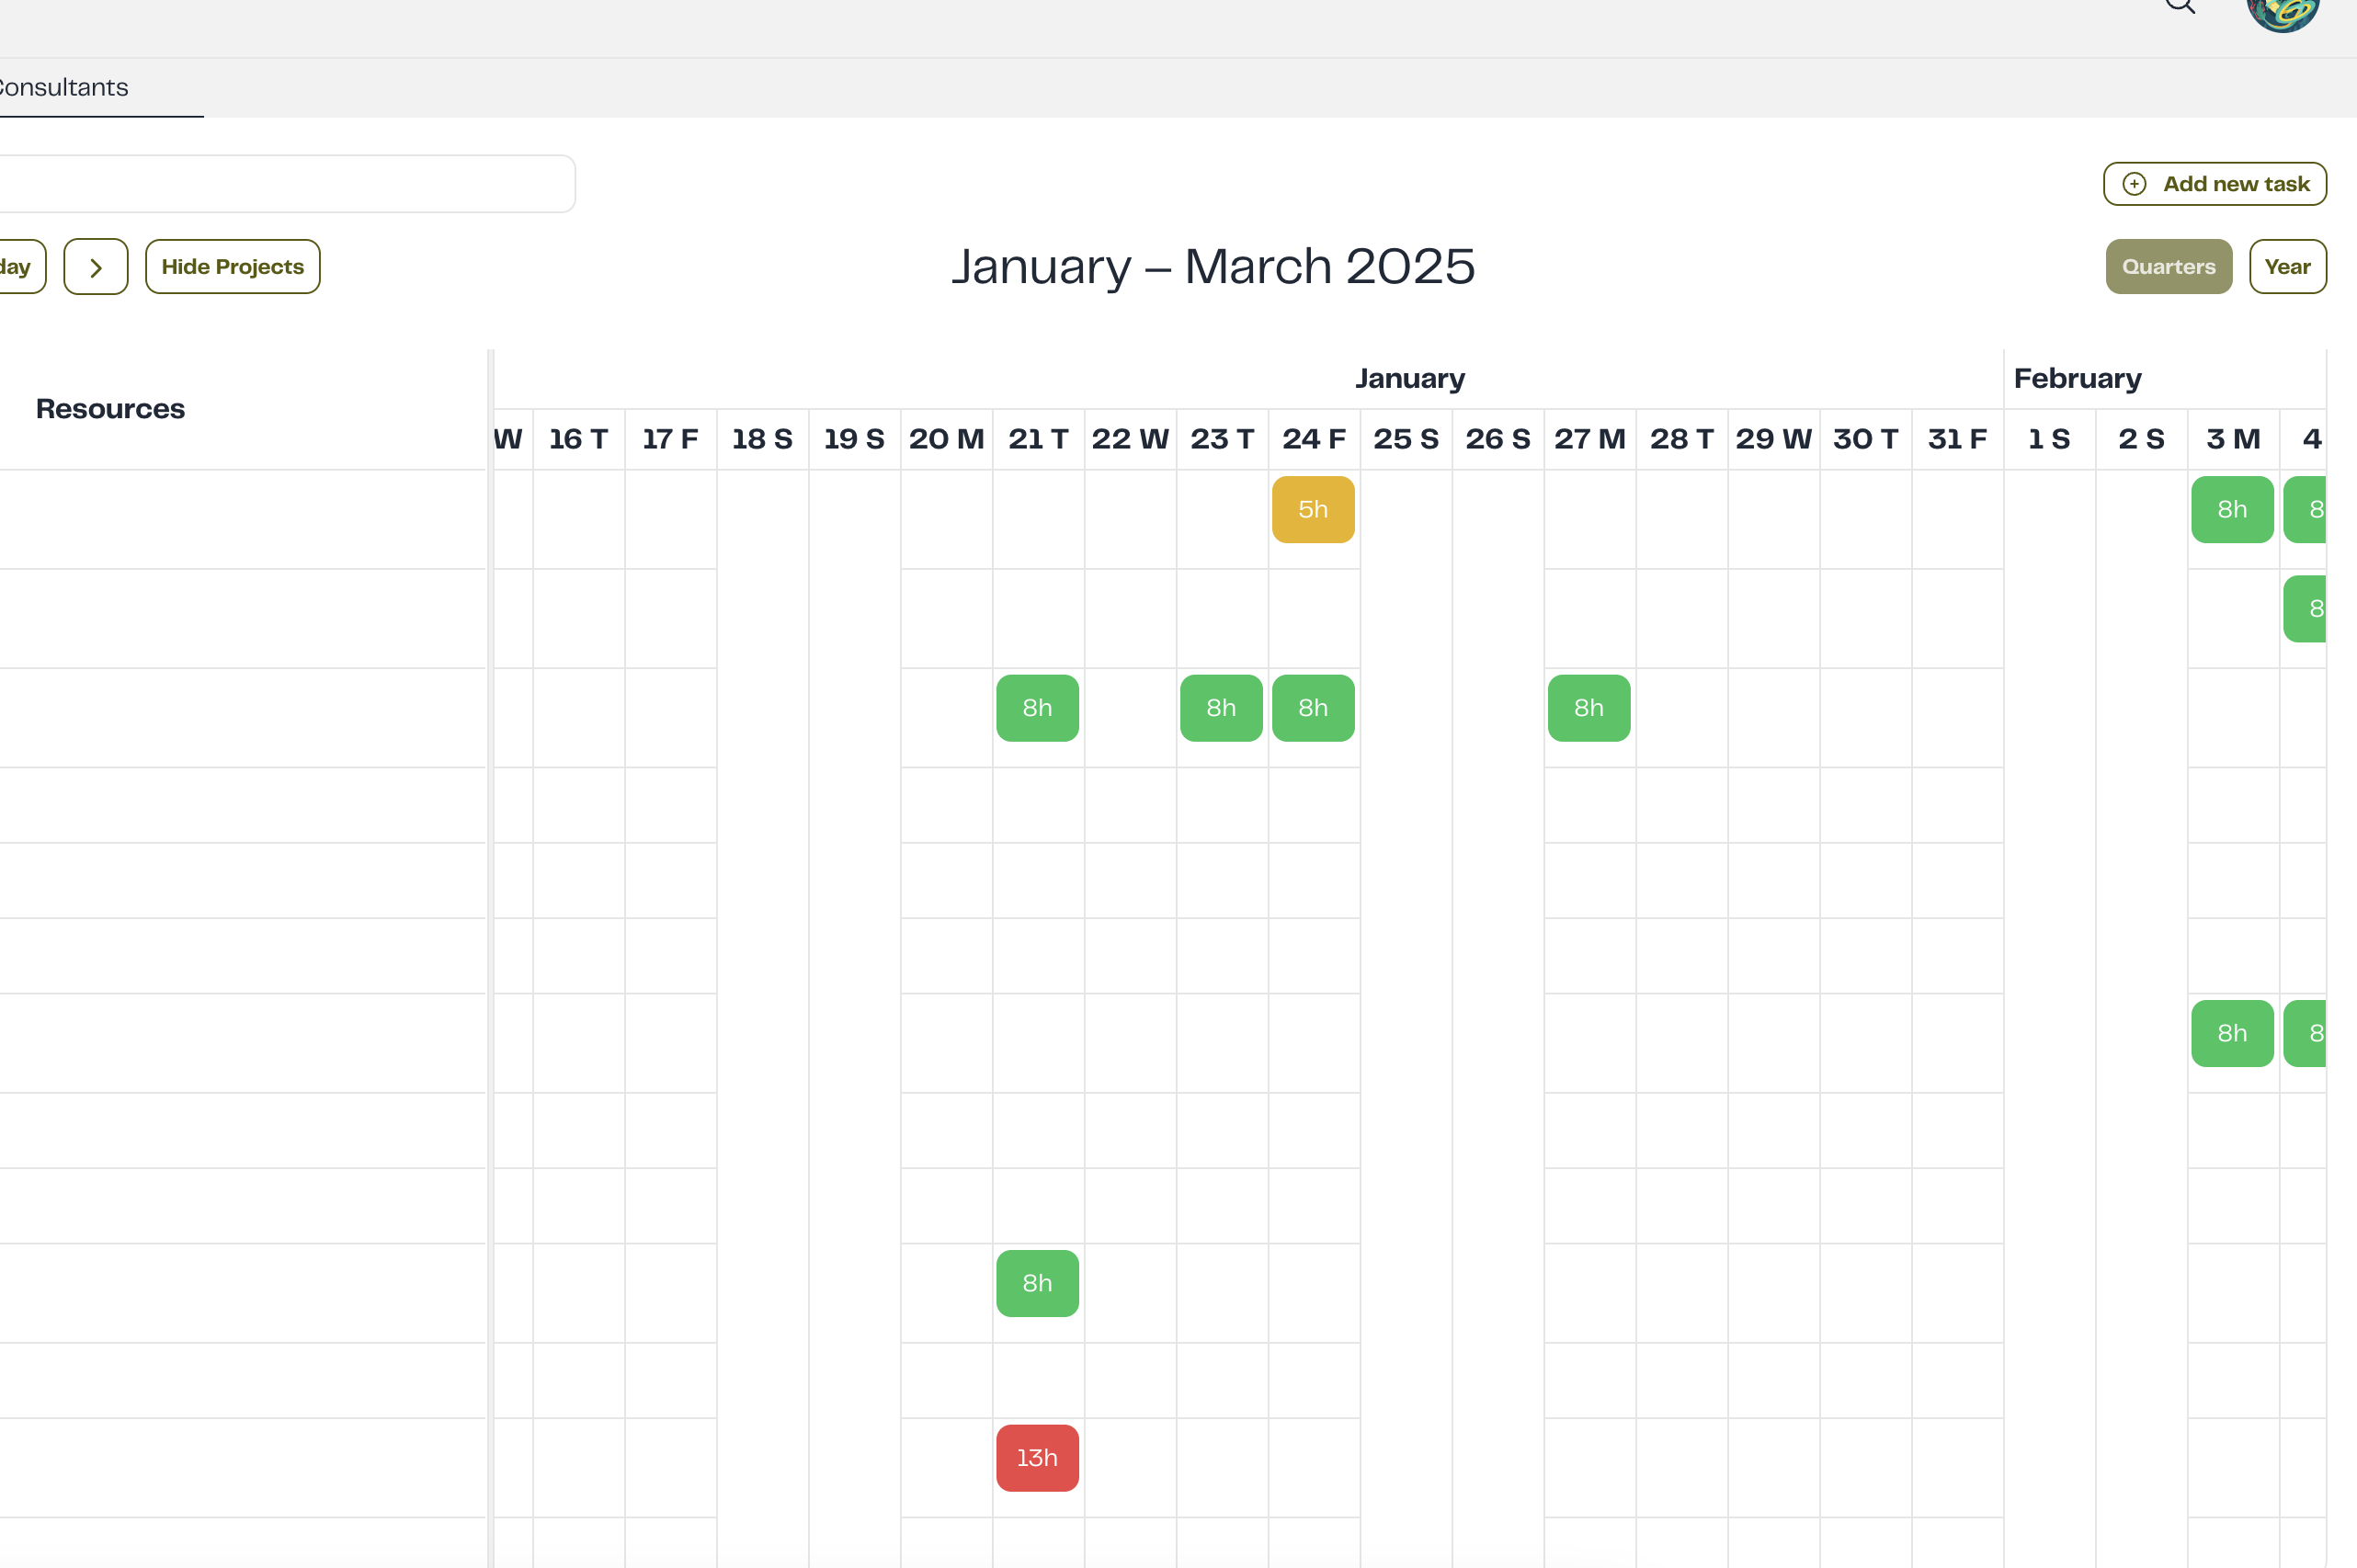
This is how the calendar will display different booking types:
- Normal Booking (8 hours) – Working hours will appear in green.
- Overbooked – Extended hours will be shown in red.
- Partially booked – Reduced hours will be displayed in yellow.