Manage assets
1. Creating assets
Steps to Create Assets
Step 1.Go to Project Assets and click the New Asset button.
Step 2.A new row will appear in the table with the following fields: Name, Type, Text, and File (file upload is optional).
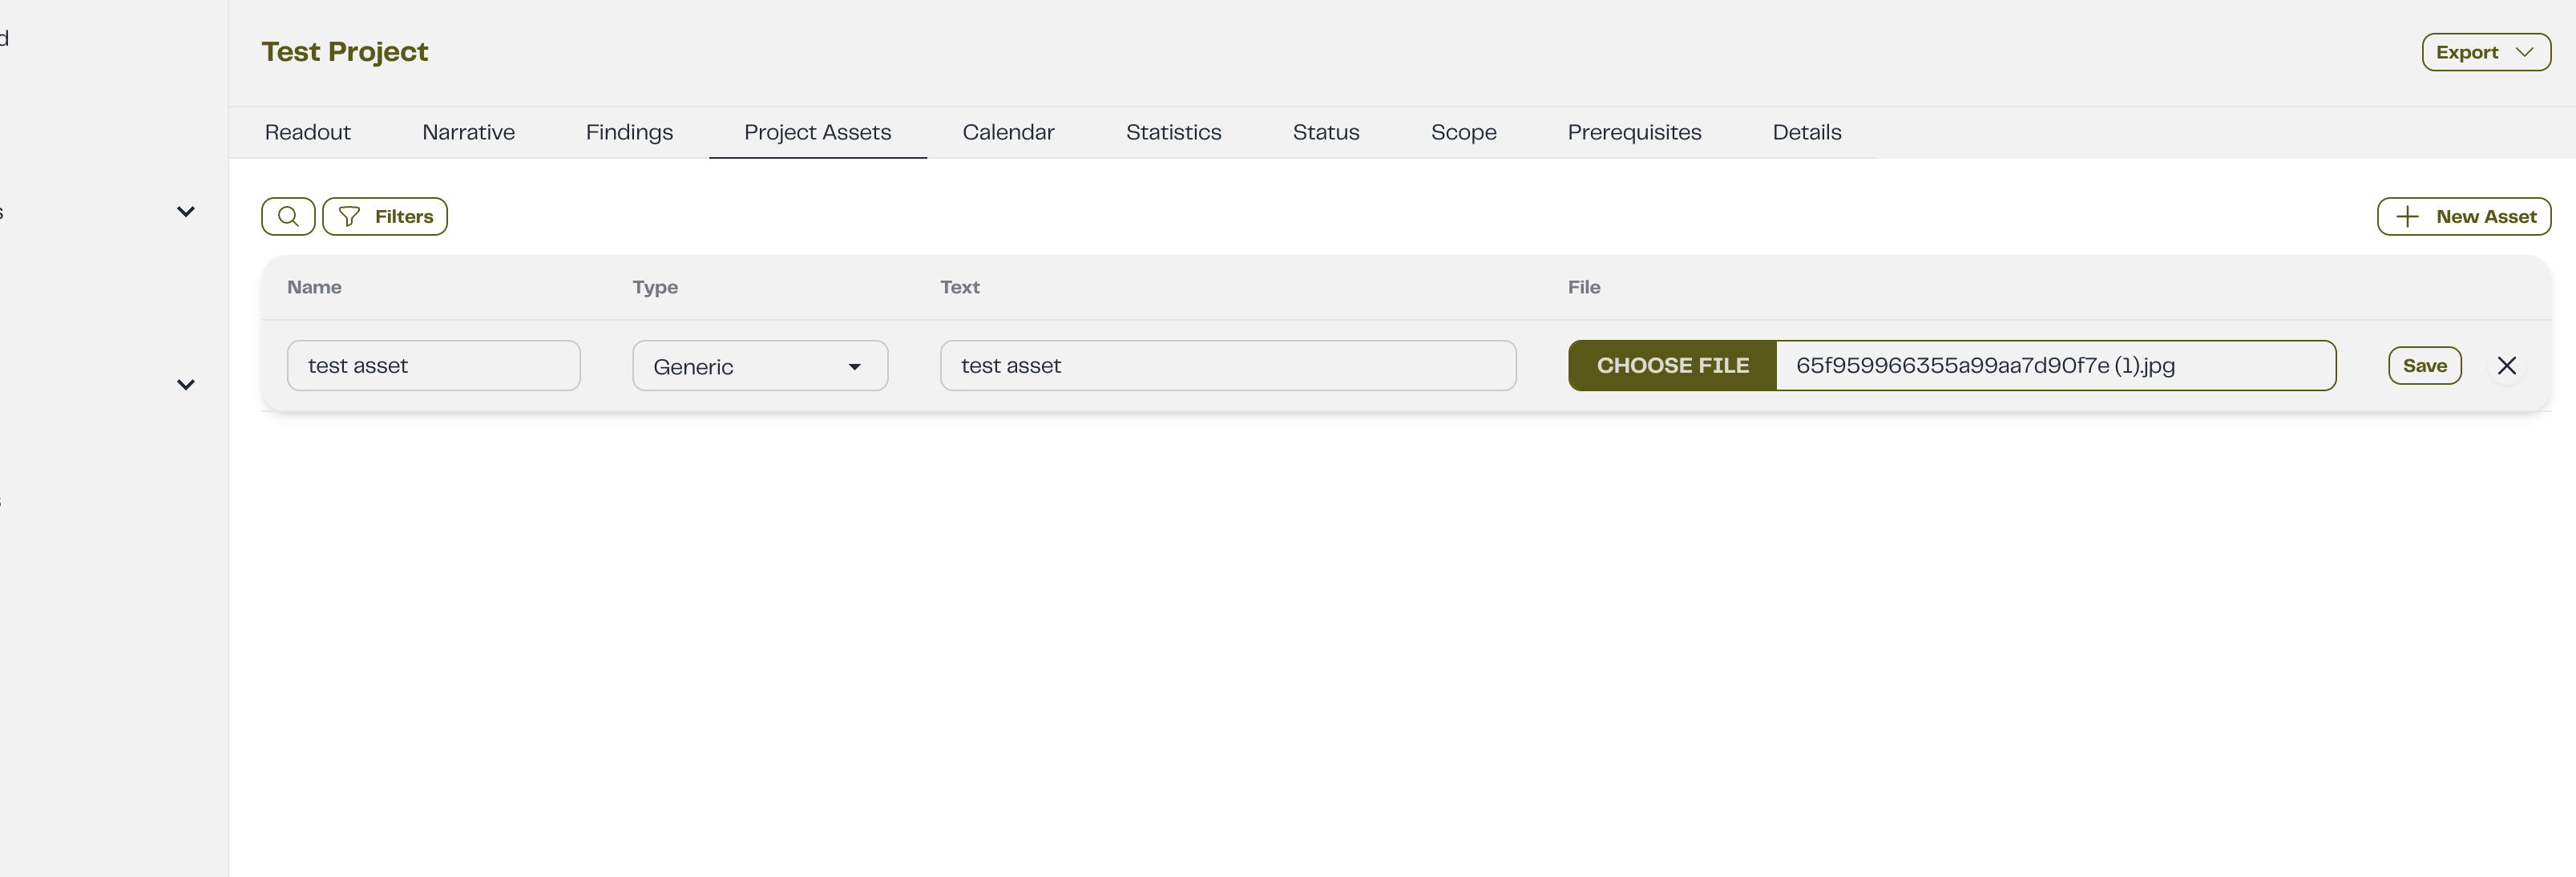
Step 3.Fill in the required fields and click the Save button to create the asset.
Step 4.Once the asset is created, a success message will confirm the creation.
2. Updating assets
Steps to update assets
Step 1.Click the pencil icon next to the asset you want to edit.This will open the asset row with input fields
Step 2.Modify the desired fields.
Step 3.Click the Save button to apply the changes
3. Deleting asset
Steps to delete asset
Step 1. Click the Trash icon next to the asset you want to remove.
Step 2. A confirmation alert will appear asking if you’re sure you want to delete the asset.
Click Yes to confirm or Cancel to keep it.
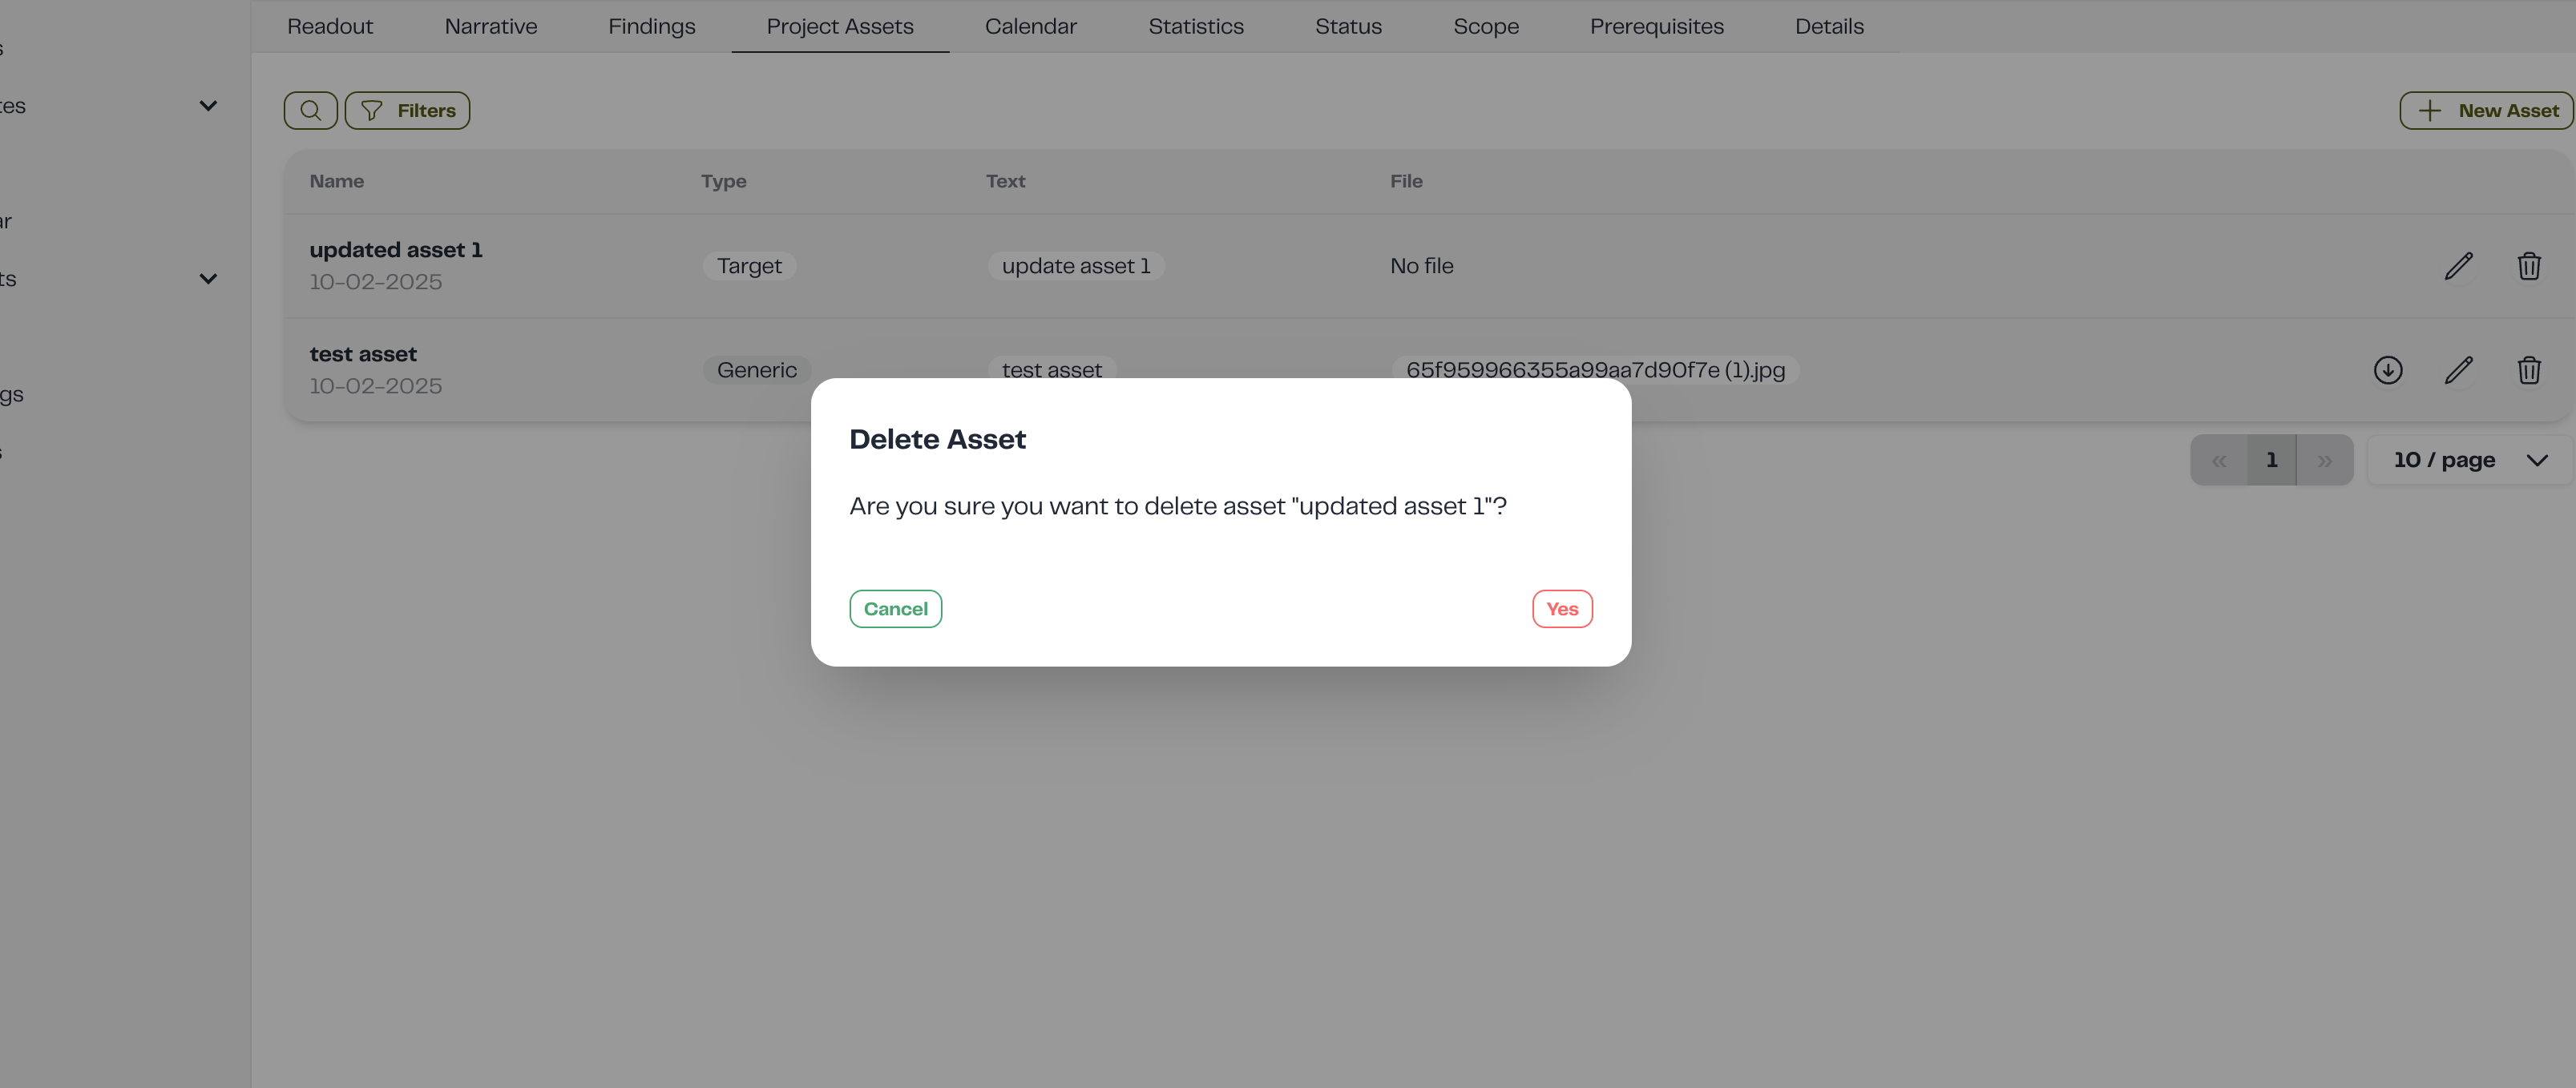
To download an uploaded asset file, simply click the arrow-down button. Also, keep in mind that clients can manage their project assets through the client portal.